Question, if I’m wanting to make a 3D print, how can I use the parcellation map to be able to have them different colored after printing. ( or in other words after I have the brain 3D printed is there a stencil that I can use to be able to spray paint each area (e.g. v1, s1, brocca’s area) of the brain; or have it broken into each piece in the STL so I can slightly change the layer that’s printed so that it stands out easier when it’s printed.)
For reference, I’m using the default Bert data set.
Does this make sense?
can you have a capture screen picture for that model with different colors. We printed dual-color with a printer machine which surporting the colors printing
If you look down in the bottom of this tutorial and search for “Visualizing Parcellation Maps”, it will show the brain with a bunch of different areas colored, I’m wanting to get it exported to an STL with each of the colors preserved. Although as far as I am aware you can only 3D print with up to two different colors currently… unless you want to get super fancy…
Also I’m using the bert data set, as are they.
For color volume printing, you may want to look at SlicerFab and this post.
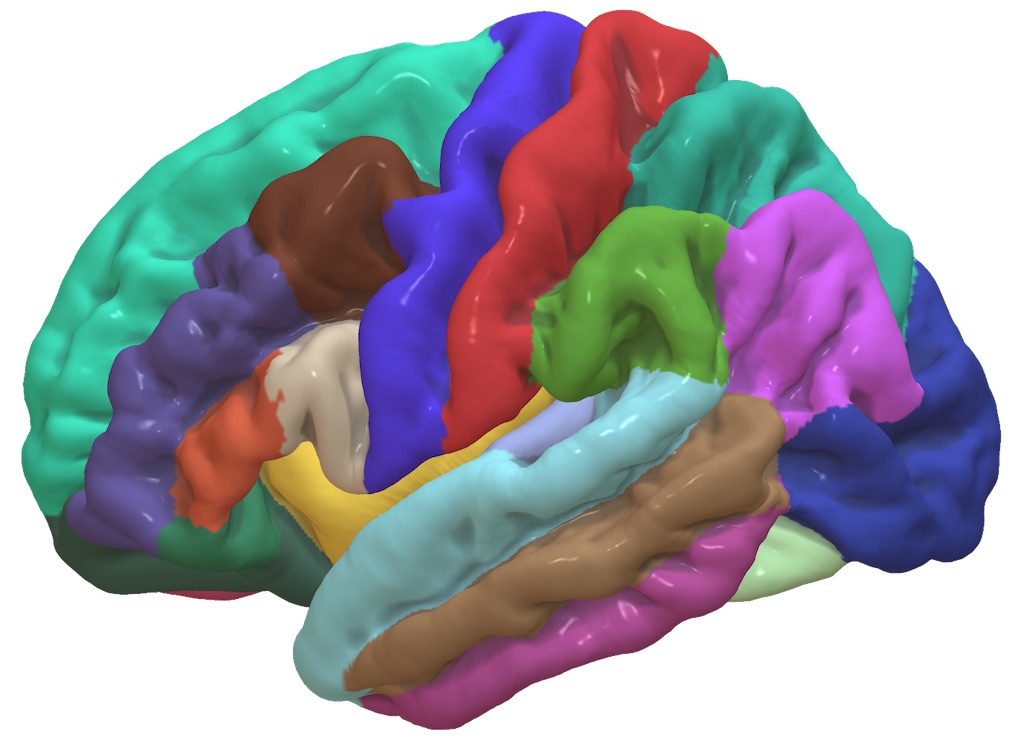
For color surface printing (e.g. FreeSurfer), I would look at ShapeWays support for color VRML files. The image below shows their matte sandstone (which I prefer to their glossy sandstone). The sandstone has a nice mass, and printing just one hemisphere provides a flat side that is nice for a paperweight.
You can create VRML format meshes with Surfice, which you can get from NITRC or GitHub. The model I show below was created by selecting the Scripting/Python/basic_paint_surface menu item and then choosing the Advanced/SaveMesh menu item. You can also create this type of mesh from the graphical interface. Finally, for an example of FreeSurfer brain regions (e.g. annot files), you can use File/Open to open the “/fs/lh.curv” mesh and select Overlays/AddOverlays to select the “/fs/boggle.annot”, which will create the mesh below with the MindBoggle map.