I’m a dental student currently learning how to use 3D Slicer.
My father, who is an implantologist, asked me to 3D print an atrophic maxilla based on a CT scan.
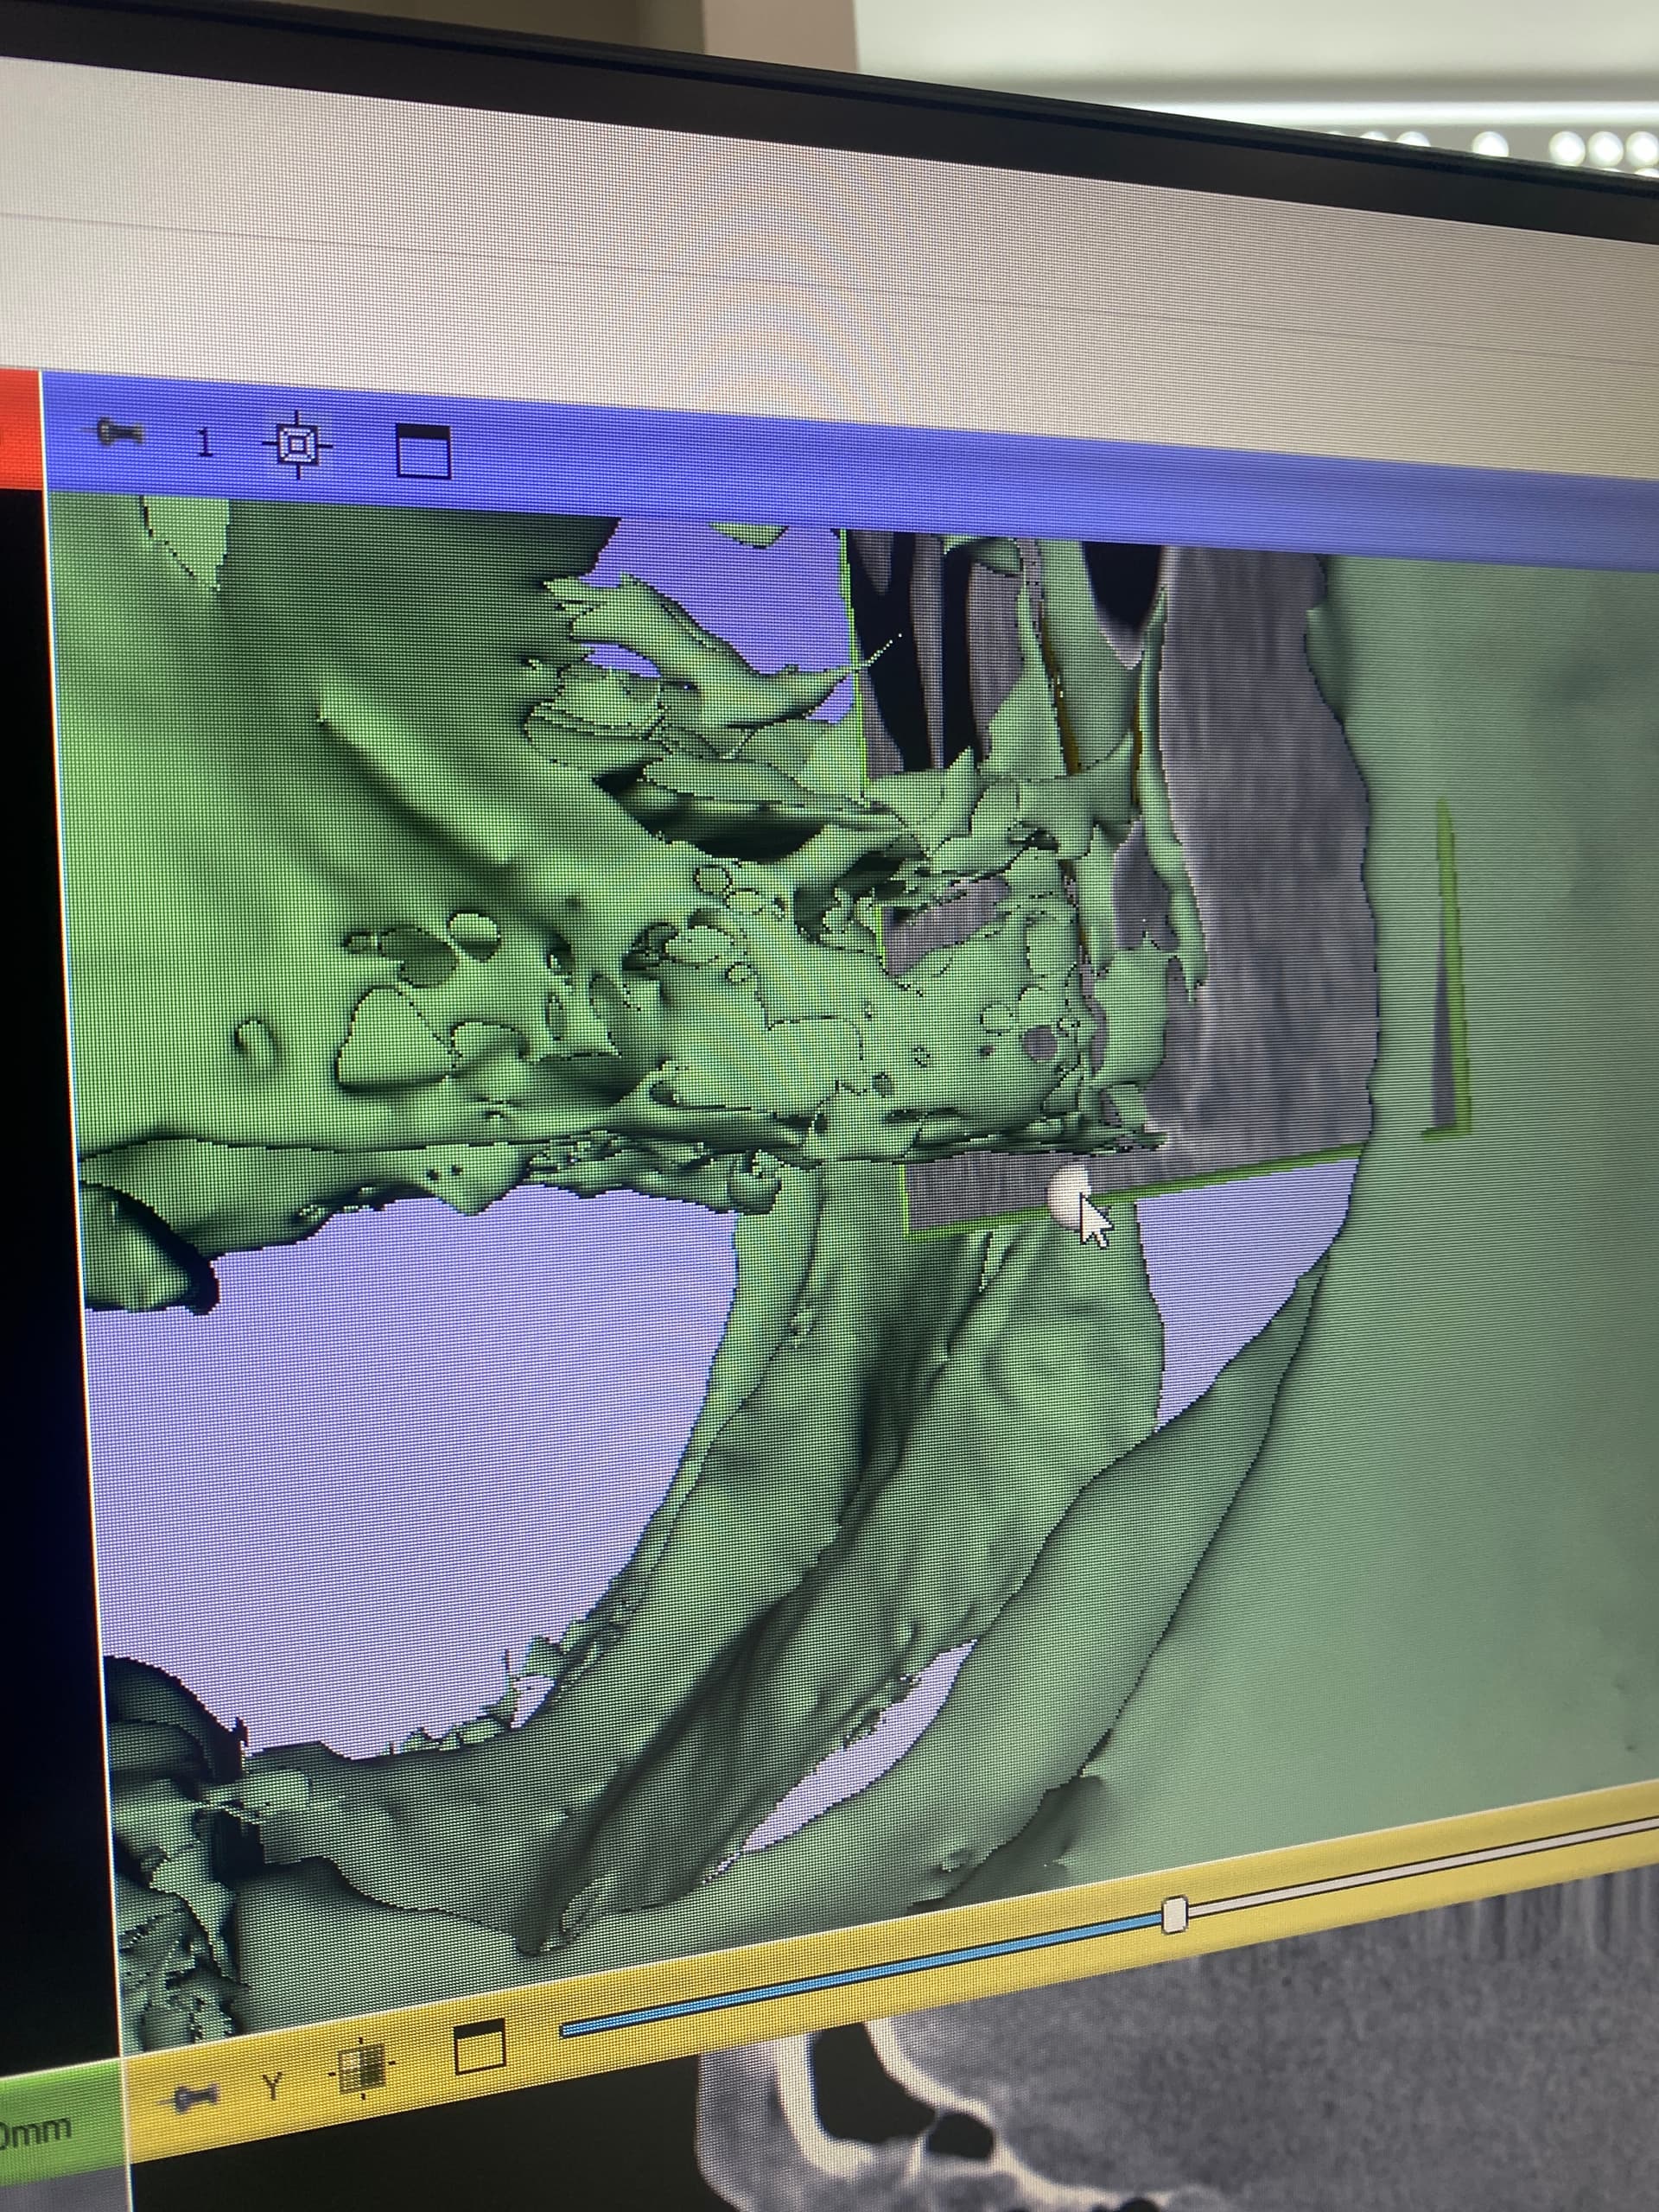
I’m using the Segment Editor module. I’ve already tried applying thresholds around 300 HU and even lower, but the bone still appears incomplete or hollow, especially around the alveolar ridge and other thin cortical areas.
I’ve also tried manual painting, using smoothing, and adjusting the editable area, but I still can’t get a clean, solid segmentation suitable for 3D printing.
I’m attaching some images to show exactly what’s going wrong.
Has anyone here successfully segmented severely atrophic maxillae? I’d really appreciate any advice or workflow suggestions.
My experience is very limited - I printed a series based on a temporal bone flap that underwent aseptic resorption, and this reminds me of what I saw, with the exception that there still was a single bone flap portion. My approach would be to ask myself what is holding those seemingly discrete sections of bone in position? If the resorption is so severe that soft tissue is what is holding the maxillary remnants in place, you won’t be able to print it as a single structure (but perhaps could print it as more than one STL file with the files properly registered). You can create a notch filter for the CT data that would eliminate the HU range associated with bone and might be able to segment whatever is apparently holding the pieces in place. Is that helpful?