Creating a module for electron bolus

Hi professors

I manually designed individual electron bolus using 3D slicer software for my thesis a year ago.

Now I have written Python codes to have electron bolus in 3D slicer automatically. and I am eager to add these codes as a module in the SlicerRT extension. I should add that note in writing these codes, I have used the SlicerSkinMouldGenerator module codes as recommended by Professor Lasso.

Unfortunately, I don’t have any experience with modules, and GUI development.

I hope developers and experts can help me convert these codes into a usable module

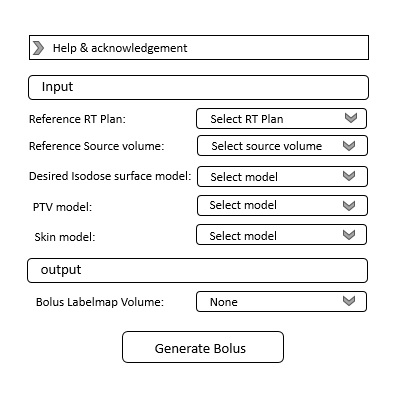
This module will be able to design a bolus on the top of the skin to match a desired isodose level to the distal surface of the PTV. So we can spare more normal tissue.

In the following, I will give a summary of the function of my Python scripted codes:

  • First I import the CT, RT structure (skin and ptv), RT Plan and RT dose.

  • The desired isodose model is made using the isodose module in the SlicerRT extension.

  • The RT plan metadata is accessed to obtain the isocenter and gantry angle for marking the source.

  • The points of the PTV are separated in each slice, and the source above each slice (Source_coordinate_m) is considered.

  • The farthest point of the PTV on each side (R-L coordinate) from its center is found, and a margin is applied to account for the length of bolus in each slice (mL & mR).
    image

  • The mL and mR points are connected to Source_coordinate_m to form two lines, and then angle between two lines is found
    image

  • The angle is divided into small angles with a step of 0.1 degree.
    image

  • In each step, consideration is given to the line passing through the skin, PTV, and isodose.

  • putting a dot above the skin along the line equal to the distance of the intersection of the line with ptv and isodose. These dots are the border of the bolus
    image

  • Dots are converted into poly data and then transformed into image data.

  • The image data from each slice is merged into one labelmap volume

  • Now I have a bolus with labelmap volume format

  • I can convert it to a segment or model by using 3d slicer’s capabilities.

image

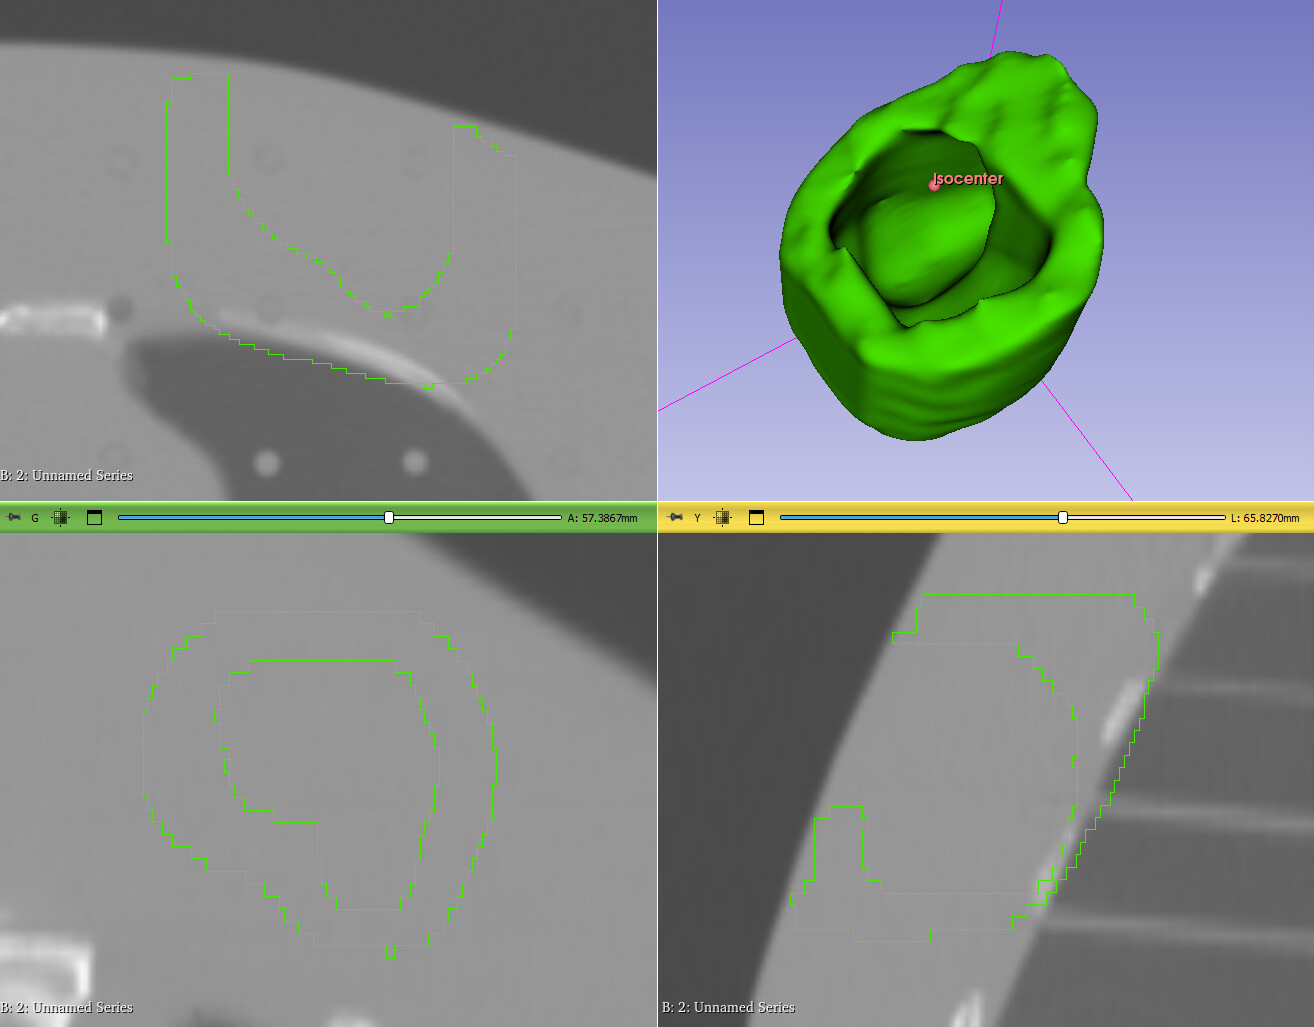
I checked the bolus in Isogray TPS. (you can see figures in file 1 - Google Drive)
Its performance was appropriate and desired isodose surface approached the distal surface of PTV. However, in some cases at the edge of the field, it may need further handling
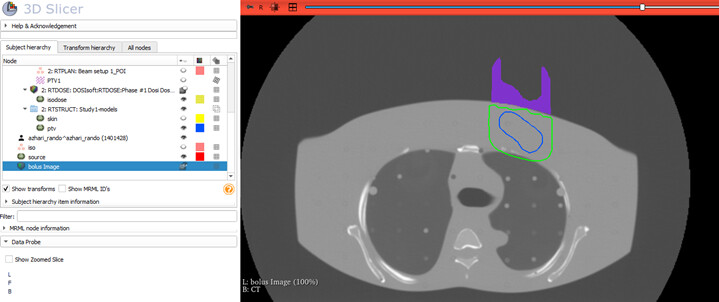
You can see other bolus designed for another PTV below and its performance in TPS in (file 2 - Google Drive)
image

.I think by these codes we can have an elementary shape of the electron bolus but it must be checked in TPS before using it
I am eager to provide you with the code I have collected and hope you can help me convert this code into a usable module.
I’m requesting help from developers and other experts to convert my codes into a usable module and integrate it into the SlicerRT extension. Additionally, I’m willing to provide the codes to anyone willing to assist me further in collaboration.

I eagerly await feedback and responses.

Hi Sima,

Thanks a lot for the nice detailed description! It looks good to me, but I’d like to have a better understanding of certain parts (e.g. “The points of the PTV are separated in each slice, and the source above each slice (Source_coordinate_m ) is considered”).

In any case you say that you have some Python scripts for this. Are they available in any place? Not sure if you want to add them to a temporary GitHub repository. An alternative could be to create a Git jist for the scripts.

After being able to reproduce the steps and understanding the code, we can discuss making it a proper module. I am happy to help with this.

Hello Dear Csaba

I am very pleased to see your message. I apologize for my delayed response; I was outside the city and had limited internet access.

I have uploaded the code to Gist for further review, and I provide the link here

I have also uploaded the files I used to Google Drive

https://drive.google.com/drive/folders/1aLHAig9APZxupwi0To-rrPZDxj2iEr9N?usp=sharing

I would appreciate it if you could take a look at it whenever you have time

Please let me know if you need any further explanation on any part of it, and I’d be happy to explain

I eagerly await your feedback

thanks
Sima

Excellent, thank you! I think in order to get started with the module development it would be really useful to also have some kind of sketch of the user interface that the new module will have. Can you please provide such a sketch (drawing)?

Another thing to decide in the beginning is where this module will live. Can you confirm that you would like this to be part of the SlicerRT extension?

Hi
Thank you a lot for your answer
If I have understood your intention correctly, considering the theme maintained across all modules in 3d slicer software, I can suggest the following image as a sketch of the user interface.
sketch

In response to your second question, since the individual electron bolus is an accessory used in radiotherapy, my colleagues and I are very interested in integrating this work as a module within the SlicerRT extension.
Additionally, there are many ongoing projects within our department at Mashhad University of Medical Sciences (such as DRR dosimetry) that, could also be included in the SlicerRT extension. I would be happy to discuss these projects with you in more detail in the future.

I am currently eagerly awaiting your feedback on the electron bolus module.

thanks

This is excellent, thank you! This week is very busy for me, but I’ll try to get started as soon as possible.

Is there a reason you want the bolus as a labelmap volume and not a segment? Labelmaps cannot easily be displayed in 3D, and most of the computations regarding “labelmaps” are available for segmentation nodes in modern Slicer.

Same goes for PTV and Skin, for which I don’t see an obvious reason why we should convert them from segments to model nodes.

Thank you very much. I will wait as long as you have the opportunity.
Regarding your question, I must say that there is no specific reason; rather, the code guided me in this direction. As I mentioned initially, after obtaining the label map, I manually converted it to a segment and model by right-clicking it to view the output in 3D on the body. If you believe it would be better for the production to be in segment form, I would appreciate your assistance in modifying this part.

In my experience with Slicer, I found that modules typically work with models. Therefore, I started developing the code with the model and proceeded accordingly and I cannot currently predict what would happen to the code and its output if it were to work with segments instead.

I should also mention that I have been searching, assembling, and modifying codes step by step through research on Slicer Forum, GitHub, and other sources. Wherever you, with your expertise, see the need for improvements, I will gladly accept your suggestions.

Well, in the past there were only models and labelmaps, so there might be a historic bias in the available modules. However, now that the segmentations are stored in segmentation nodes, also if loaded from RTSTRUCT, including the PTV and all other structures you need, it makes more sense to use that format than converting back and forth (this was the main motivation behind creating the segmentations infrastructure, to prevent the need for manual conversions).

I have one more request if you don’t mind. Since I cannot really judge the algorithmic correctness of your method, can you please describe the theory behind your solution (that you already explained in detail above)? I mean I know what you do, but I don’t know why. I asked this before but you may have not seen it:

Please do not restrain yourself to this one question but describe the different steps in your algorithm. We will make this part of the documentation, so this will be useful later as well. And it will allow me to create the module with more confidence in what it does. Thank you!

Hi Csaba
I saw your question about ‘Source_coordinate_m’ but assumed that when you saw the code, your question was answered. That’s why I didn’t explain further. Now I’ll try to provide a more detailed explanation.

We have a point source located 100 centimeters away from the skin.

The basis of my work is that I have performed the calculations in 2D instead of 3D. That is, I first obtained a bolus for each slice and finally merged the boluses of each slice to arrive at a 3D bolus.

To calculate the bolus for one slice, I set the third component of the source equal to the third component of that slice (in effect, I have moved the source to the top of the slice).

In radiotherapy, it is assumed that the radiation beams from the point source are parallel and strike the surface perpendicularly, especially when the source is located at a significant distance from the skin. When the source is assumed above each slice, the assumption of perpendicularity to the surface remains valid. This means that small changes in the source position should not result in significant errors in the distribution of the radiation dose. Therefore, it can be said that, in practice, these small movements of the source above each slice generally do not introduce significant errors.

In the calculations for each slice: each beam (with an accuracy of 0.1) from the source strikes the skin, PTV (Planning Target Volume), and isodose surface. The distance from the point of intersection to the PTV and the isodose surface is calculated, and a point is placed at the same distance in the same direction as the beam (this point is one of the bolus points in that slice). These calculations are performed for all beams considered in that slice, and the resulting points form the 2D bolus in that slice.


Finally, the images of each slice are merged, resulting in the formation of a 3D bolus.
I acknowledge that my assumptions may have a few errors, especially at the edges of the field (Maybe) However, this approach can create an initial shape of the bolus, which can be checked in TPS and refined as needed before being used.
I believe this method can serve as an initial version of the module, and in later versions, it can be further refined for improved performance.

I and my colleague spent several hours in the past days analyzing the algorithm and the code, trying to run it etc. We have reached the conclusion that the algorithm is too fragile and inaccurate to be integrated in such a widely used toolkit as SlicerRT. It works with many assumptions, and based on our test runs it does not work perfectly either (e.g. the bolus does not reach all the way to the edge of the dose deposition area).

Please consider that most of the modules integrated into SlicerRT have a published article providing evidence that the algorithm under the module works as expected (validation). In contrast, this algorithm is in the prototype phase and needs serious rework. For example, the code uses many hardcoded values and looks into the DICOM files, instead of getting the information from Slicer (angles, SAD, file paths, node names, etc.). Only after making it usable without so many manual intervention can the work begin to validate it, which is necessary in order to publish it in a quasi standard RT toolkit.

Besides the concerns about accuracy and robustness, one problem of the algorithm is that it works in 2D, which poses limitations in its accuracy, and its performance as well (it runs very slow).

I am not a radiation physicist, but came up with a possible alternative that seems more robust, faster, and achievable with standard Slicer tools.

The idea is basically to treat every object in 3D and use simple operations to achieve the same result. Let’s consider the same scenario as you did.

What we need is to keep the distal part of the isodose volume. We could achieve this by subtracting the PTV from the isodose, and do this all the way towards the source until there is no change in the isodose. We could potentially use the extrusion filter in VTK but out of experience I know it does not work for closed surfaces such as in this case. Instead, like in another application where I needed to do the same thing, I translated successively copies of the PTV towards the source, and kept subtracting them from the isodose labelmap.

Then we get this:

My question is: can this be usable as the bolus already?

It absorbs the same amount of dose as the output of your algorithm, the only difference is that it does not perfectly fit the skin. However, we can come up with solutions for this, such as support elements all around (where there is no dose anyway).

This is a much cleaner and simpler algorithm, and I could implement it way faster than fixing up your algorithm. If this is a possibility (you tell me as again, I’m not working in the field), would you accept this solution? It could be validated in your center and we could publish the result. Please let me know!

Dear Professor,

I have read your message thoroughly and have a few comments on it. In fact, the idea you proposed was our initial approach to the issue, and we had already taken similar steps. However, before I can provide you with a complete response, I need to consult with my supervisors. One of my supervisors, who is a senior radiation physicist at the hospital, is currently on vacation. Therefore, I must wait for his return before proceeding.

I felt it was important to give you feedback and assure you that I will respond to your message as soon as possible.

I sincerely apologize for the considerable delay in responding to you.
Some of the concerns you raised about the algorithm are acceptable to me.
For example, the code was written as a script (not as a class) and I reviewed its performance step-by-step by running in the Python console, so I used file paths and node names. I assumed these would be modified and adapted once the code is converted into a module format. (I have previously asked for help in my messages because I lack experience and I am not very professional in programming)
To ensure that the code works correctly in all radiation beam positions (from 0 to 180 degrees), I implemented certain conditions. In fact, to fix the bugs I encountered and generalize the code for use in all spaces, additional assumptions were made.
Regarding the issue where ‘the bolus does not reach to the edge of the dose deposition area,’ the problem generally occurs at the edges of the field. The solution is to use a larger bolus (for instance, in the axial direction, two or three slices larger than the PTV boundary, and in the lateral direction, a few centimeters larger than the PTV boundary)
The idea you proposed was our initial concept (moving the normal tissue under the PTV as a bolus to the skin surface along the beam direction). However, over time, we arrived at the current solution (this algorithm).
The goal is to shift the isodoses closer to the distal surface of the PTV, so the bolus must be placed directly on the skin without any air gaps.
The model you suggested should, after the last stage, be able to automatically calculate the distance between the bolus and the body (air gap) and fill it in. Then it should also reduce the thickness from the top of the bolus along the same axis to ensure that the thickness remains consistent.


One fundamental problem we might encounter is that if the height of the air gap that needs to be filled is greater than the thickness above it, it is not possible to reduce it. In such cases, the bolus effectively gets removed from that location. So, we aimed to place the required distance directly on the skin.
I believe that if you have an idea for this problem, it could serve as an alternative to my algorithm.
I eagerly await your feedback

This could be very difficult without using “tricks”. I made this suggestion because it is very simple and thus robust, as opposed to a complex but fragile algorithm. That’s why I was asking about the consequences of the air gap, as I’m not a physicist.

It would facilitate the discussion if you gave an objective explanation of the reason for this. Thank you.

One of the persistent challenges in creating custom boluses for patients in electron therapy, as discussed in various articles, is achieving conformity between the bolus and the irregular, curved surface of the patient’s skin. Many studies have also measured the air gap between the bolus and the body, investigating its impact on dose distribution, treatment accuracy, and precision.
In electron therapy due to the physical properties of electrons (which have lower energy and less penetration depth compared to photons), the bolus must be as close as possible to the surface of the skin. Electrons are very sensitive to distance with their energy dropping by 2 MeV per centimeter. Even a small air gap can significantly affect the dose distribution. In practice, if the bolus is positioned with a gap from the skin, the effective dose in the target area will decrease, leading to inadequate treatment.

Thank you! What I neglected was the fact that it is electrons not photons. I will be thinking on how to “collapse” the proximal (to the source) part of the bolus towards the skin in an elegant way.

In the meantime maybe you could do some cleanup of your script in case you decide it to publish your algorithm. I mentioned several concrete things to fix besides the point you reacted to in your last post.

1 Like

As I have mentioned before, I am very eager for the algorithm I have developed to be incorporated as a module in the 3D Slicer software with your help, and to include this experience in my CV. Additionally, after this, I would like to discuss other tasks being carried out in our department that have the potential to be transformed into modules.
Right now, I feel a bit confused and unsure about my role moving forward. Could you please clarify the next steps? You mentioned that you are working on your own idea. Will I have a role in that idea, and will I be of any help?

In previous messages, you mentioned that my algorithm works in 2D and is slow. I ran the algorithm on 3 PTVs (which were designed in a phantom with somewhat exaggerated shapes) and estimated the execution time of the code. On average, it took about 2 minutes (1:43, 1:56, 2:06 ) for the code to run completely and the bolus to be generated. Is this time too long to be unacceptable? (My computer is an ordinary system with a core i5 CPU and 16GB of RAM).

I plan to extract the data of several patients who are candidates for electron therapy from the hospital’s TPS this week, design boluses for them with my code, and share the dosimetric information and the code’s runtime with you.

I am very keen to understand the roadmap you have in mind and my role in this path. Could you provide me with more details?
thanks.

It’s ultimately up to you how we proceed. I have a general interest in RT, but bolus generation is not on the immediate roadmap.

Given the difficulty of fixing the simple approach I suggested in order to fulfill the dosimetric requirements, I think we can discard it for now. This approach would basically be to implement a function that collapses a segment against another using a given direction vector (@lassoan Do we have anything similar? Maybe SOFA could do it but probably an overkill). So I suggest continuing with the prototype you have.

I can help you make this script into a module, but I think it would be best to start it in its own GitHub repository, and later integrate it into SlicerRT after the validation is done.

A possible approach:

  1. You create a GitHub repository in your institution. Let me know if this is problematic, in that case I’ll create one for you, but considering ownership (control, attribution, visibility for your team, etc) you probably want to have your own
  2. Make sure both of us has write access to the repo
  3. I create an extension framework and one module in it for the bolus generation with the appropriate GUI
  4. I provide you guidance on how to integrate your code into the module

How does this sound?

This is great! This will be the validation I’ve mentioned. I assumed that you’ll want to write a journal paper about this, given that you need it for your thesis. I think it’s worthy of a full paper in a technically oriented medical physics journal (MedPhys, PESM, etc.). Once you have the module and the validation, it’s just to one step to write it.

that is a great approach.
I am trying to create GitHub repository and I put the script there
I will share with you if there is a problem with the repository construction (I don’t have experience with GitHub repository, but I will try my best to make it as I made the Gist before)

At the same time, I am working on the data of several patients for validation, and after the investigations, I will share the results with you.

It is a great honor for me to work with you.

Please don’t put the script there. Let’s follow the steps accurately. Thanks!