I would like to export each slice of a dicom as an image.
Ideally, it should be a sequence of png. slices with transparency; but it can also be a sequence of jpg, or a movie that respects the proportions of the slices (with a regular speed of movement through the volume).
I have seen a topic covering this subject but did not understand what was the final solution.
A simple solution in Slicer is to use Screen Capture module. You can choose a slice view, position range, and number of images to export. Slicer offers a couple of features that the trivial export methods cannot directly do:
save output as image sequence, animated GIF, or video
save markups, segmentations, etc. overlaid on the image (as you see it in the slice viewer)
create a lightbox (contact sheet) that shows slices on a single page (in recent Slicer versions)
save reformatted views (current orientation of the selected slice view is used)
Ooh, great, that’s exactly what I needed; thank you. By the way, is it possible to transform the black into a transparent at the moment of the screen capture?
I achieve to visualise very contrasted dicoms inside blender after using a video of it as a mask, but I have very little control on it, since the alpha is recorded all at once and cannot be tweaked based on the original image…
It is not clear what you are trying to achieve. Can you post a few screenshots?
Do you want to change image opacity depending on image intensity? Since Blender can do everything (it is the 3D Slicer of 3D modeling), I’m sure you can set this up there.
Yes actually I have been trying to use the blender addon called ‘OrtogOnBlender’ (which is more a side version of Blender since) for a few days but keep on failing to use it; therefore I tried to do it by myself with the default 2.8 version and achieve to do it through two techniques:
-the first passes through the conversion of a video sequence of the dicom, used a a mask on a white color, into a png-image sequence(serie) with alpha channel. It works well for contrasted images of bones.
-the second is to import the dicom as images without alpha channel inside Blender, with an offset between the slices, and to set up a material based on nodes that tells the image to convert its black colour into transparent alpha; and it works even better since I can control not only the darkness but the transparency from the source.
My problem is that each image has a different texture and therefore a different material, and that I need to plug the input driver of the alpha(transparency) into the color output of the texture, instead of the alpha output (as it is set by default). There is no way to batch this very simple action on hundreds of images without scripting and I do not write scripts… Nearly every other action, beside of nodes can be done simultaneously(multiple select and Alt-click the change), but not inside a node tree… I asked about it on several Blender forums but did not get any answer because there isn’t any, I think…
Second method:importing the images without transparency and converting the black into transparent on each image (best option to control the transparency but no way to batch-use the setup on several images at the same time without scripting)
How would you like these slices to appear? As a volume? Or as a stack of slices (only the top-most slice content actually visible)? Can you draw a sketch, or photoshop an image that you would like to end up having?
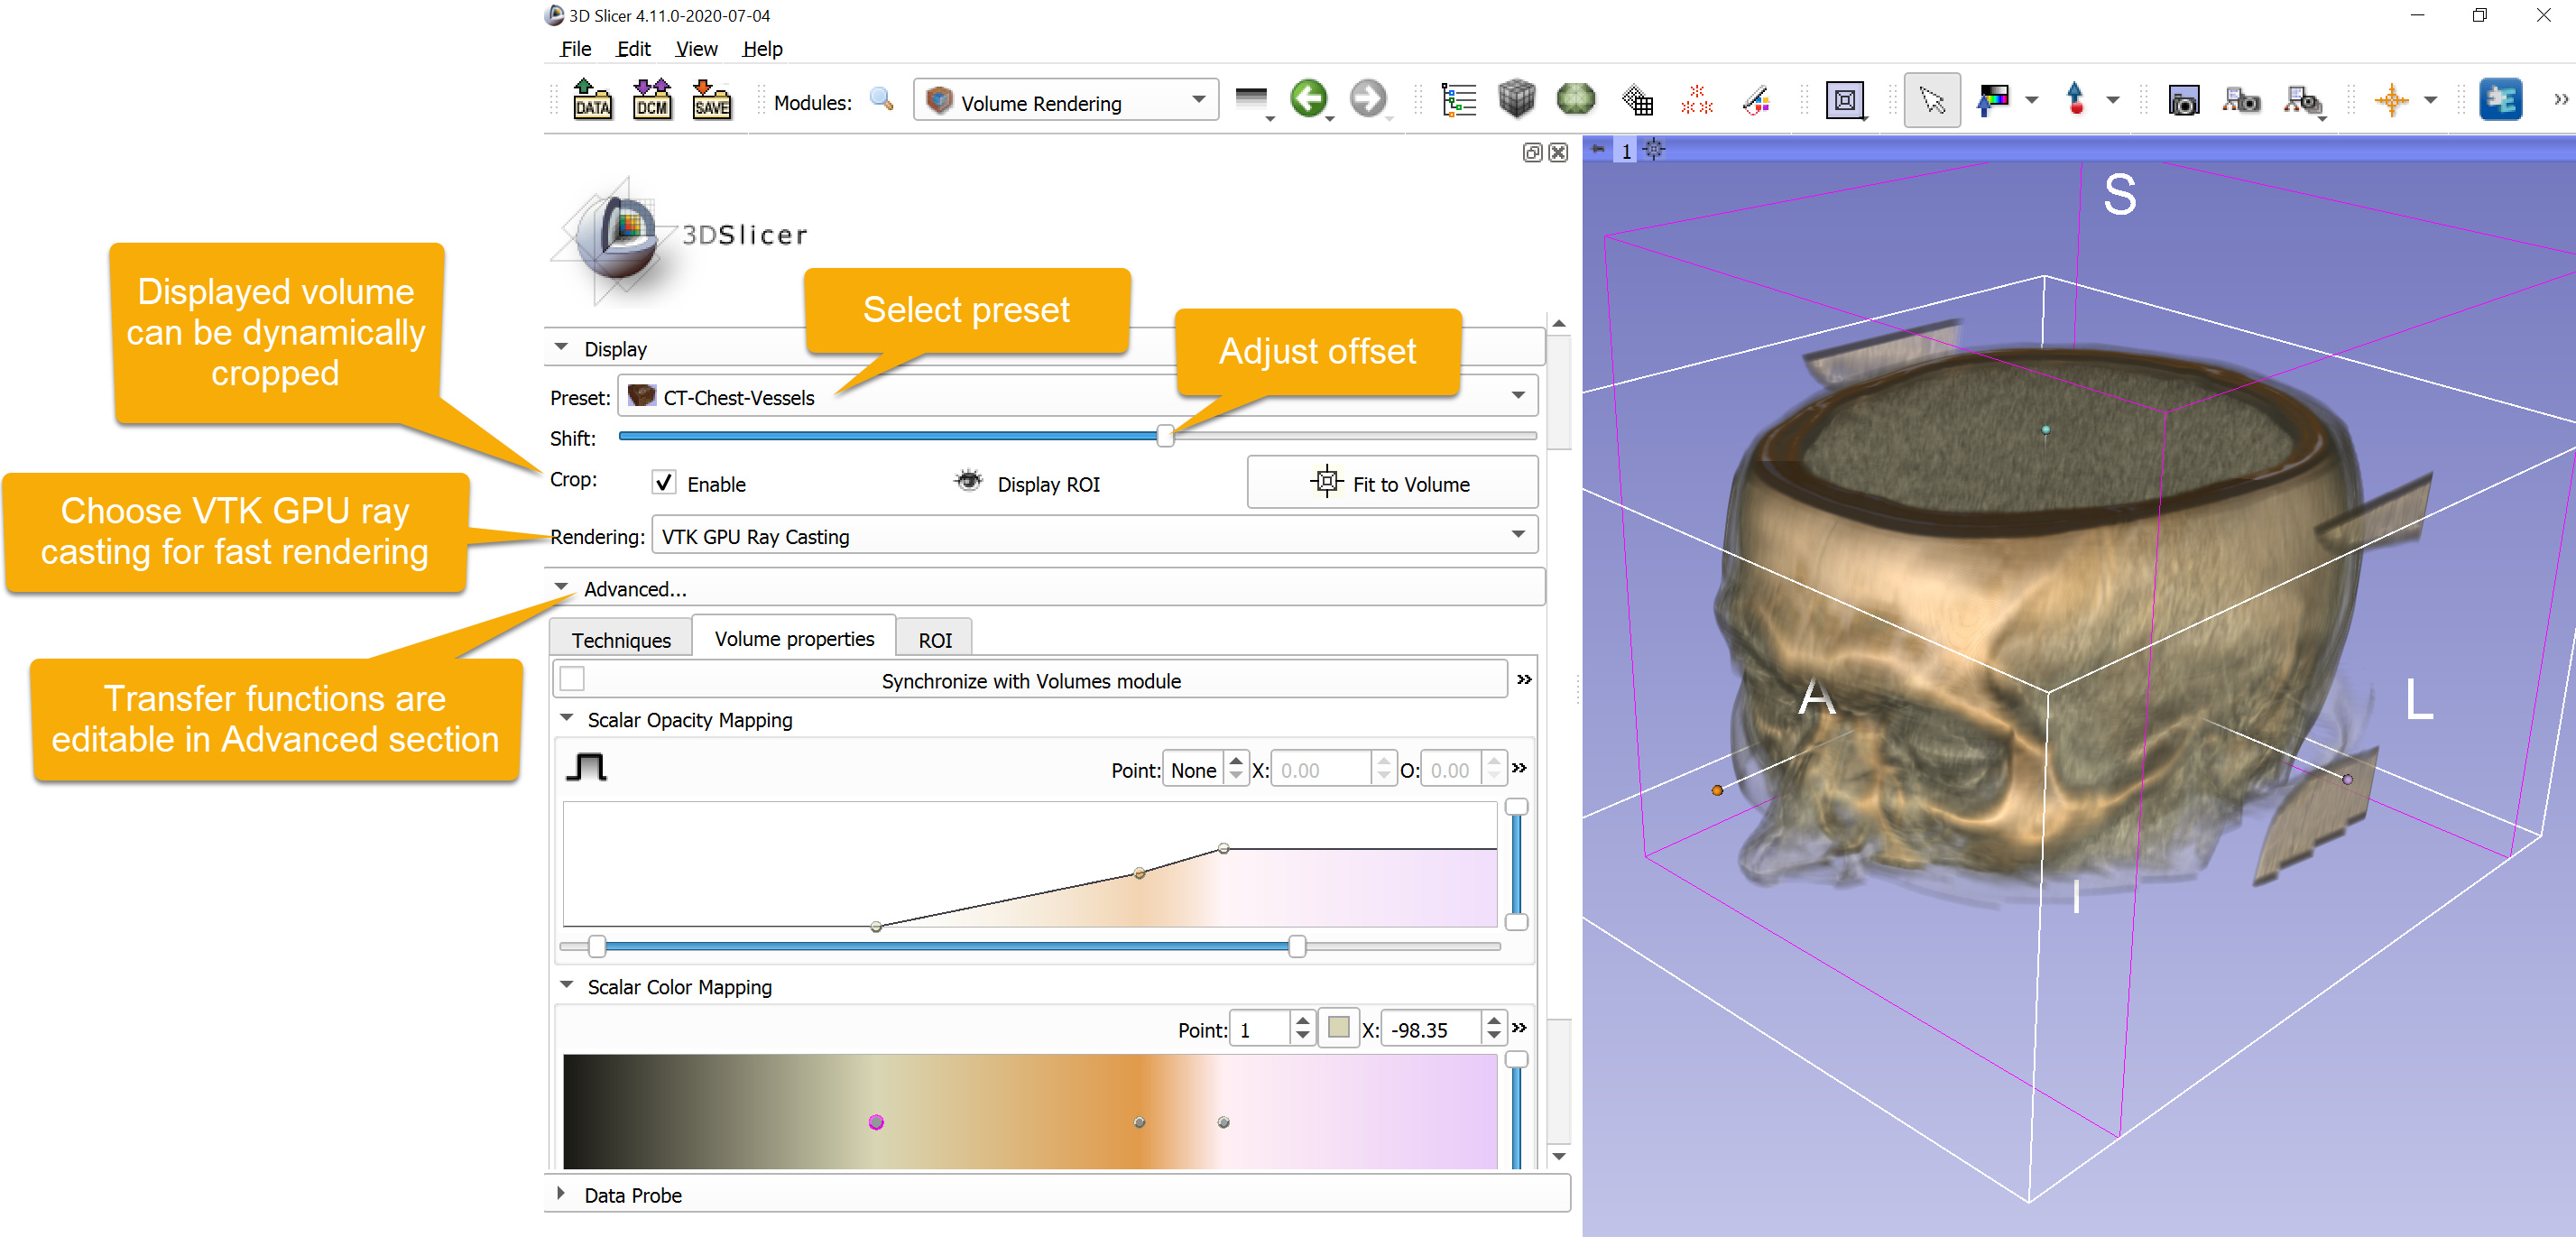
This is available in Slicer’s “Volume rendering” module. You can get started quickly by choosing a preset and adjusting “Shift” slider. You also have full control over opacity, color, and gradient transfer functions so that you can make any selected intensity range visible and control its color and extract contours.
It should be much easier to use than Blender’s tool (as it is developed specifically for displaying clinical images) and it works with 4D volumes, can be combined with all the other quantification and analysis features, etc.
We’ll soon enable multi-volume rendering, which allows proper mixing of overlapping volumes (multiple volumes or different parts of the same volume rendered with different settings).
Hello everyone,
I’m back on this issue: I need to export a series of images from either a multilayer tif, or a .nrrd volume. My purpose is to try and visualize these in another software to add other functions.
This is the code to capture images with a transparent background in the 3D view.
You can achieve a similar result in the 2D Slice view with slight modifications.
# Caputer 3D rendering window with transparent background
def c(path = 0):
    renderWindow = slicer.app.layoutManager().threeDWidget(0).threeDView().renderWindow()
    renderWindow.SetAlphaBitPlanes(1)
    wti = vtk.vtkWindowToImageFilter()
    wti.SetInput(renderWindow)
    wti.SetInputBufferTypeToRGBA()
    writer = vtk.vtkPNGWriter()
    now = datetime.datetime.now()
    if path == 0:
        nowDatetime = now.strftime('%Y-%m-%d-%H-%M-%S')
        writer.SetFileName("D:\\capture"+nowDatetime+".png")
    else:
        writer.SetFileName(path)

    writer.SetInputConnection(wti.GetOutputPort())
    writer.Write()


def d():
    viewNodeID = "vtkMRMLViewNode1"
    cap = ScreenCapture.ScreenCaptureLogic()
    view = cap.viewFromNode(slicer.mrmlScene.GetNodeByID(viewNodeID))
    now = datetime.datetime.now()
    nowDatetime = now.strftime('%Y-%m-%d-%H-%M-%S')
    cap.captureImageFromView(view, "D:\\capture"+nowDatetime+".png")